I am making a billion {8} knit pajama tops for Christmas gifts this year, and I have gone from feeling intimidated by neckbands, to feeling pretty comfortable with them. I thought I would share my step by step with you, just in case someone out there might need some second reference. I am using a walking foot, and crazy old leftover jersey sheets. This is a 4T sized neckband, so don’t be alarmed at its size:) I mainly use the lighting bolt looking stretch stitch on my Bernina, and a stretch needle. I wish I had a ballpoint needle {you’ll see why later}.
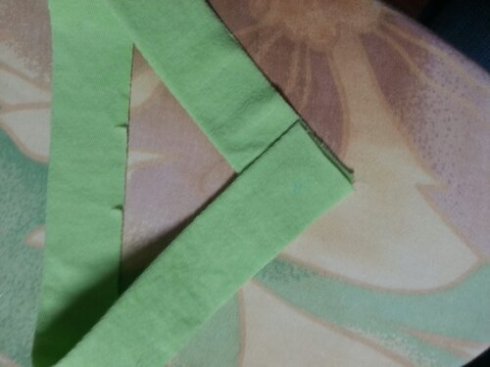
Overlap your neckband. Right over left, or left over right, do what you please.
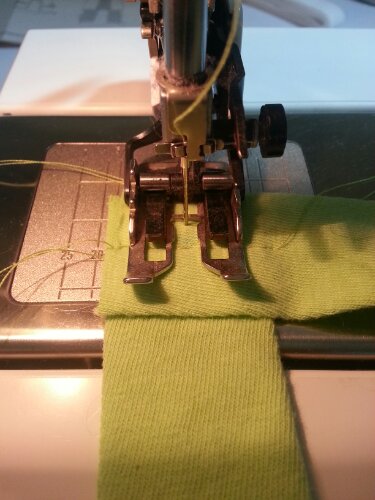
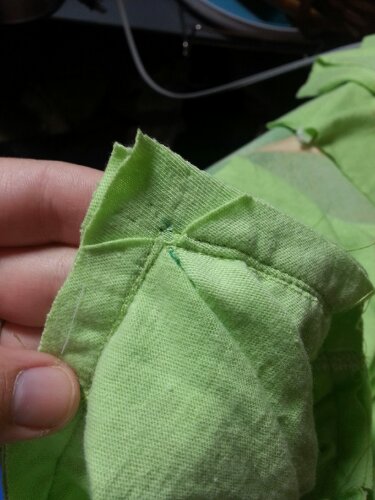
Baste the ends of the neckband together along seam lines {I did 5/8in}, though all thicknesses.
Basting the second side, forming an X.
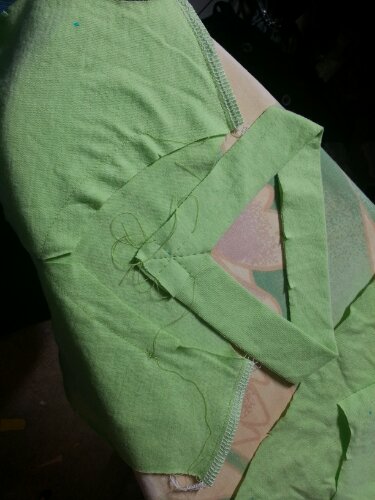
Then Baste up the center, to make a star {*}
It will look this when you are finished. I also reinforced the center front of the shirt. I was careful not to stretch the fabric, and I used a normal stretch stitch. Then I snipped the V right to the dot, being careful not to snip my stitches that I just sewed.
Next up, I made sure to complete the neck hole, by joining the sleeves right sides together. No I’m ready to put the band in!
It’s really hard to show this in pictures, but I did my best, so here goes.
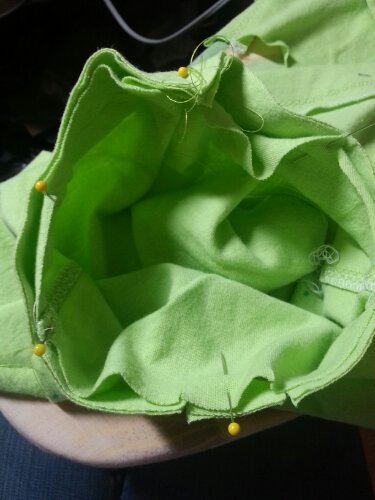
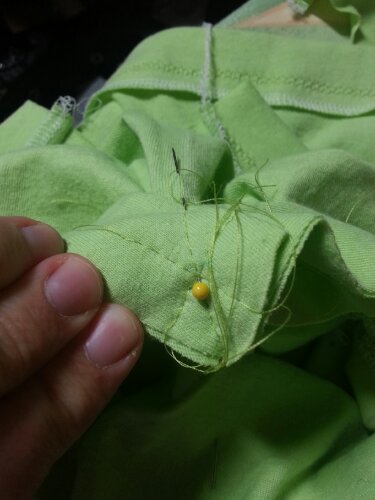
With right sides together, pin the neckband to the neck edge, matching center back notches, and aligning the shoulder seams with the dots that match. Match the center front dot on the shirt front with the center of your star, and pin.
Here you can see how I pinned the V. {There will be a lot of extra fabric in the V on the other side, I made sure the head of the pin was lined up in the center of the star and went all the way through the center dot to match them up, then the rest of the pin goes through to keep the pin in, not to hold the gobs of fabric in place}
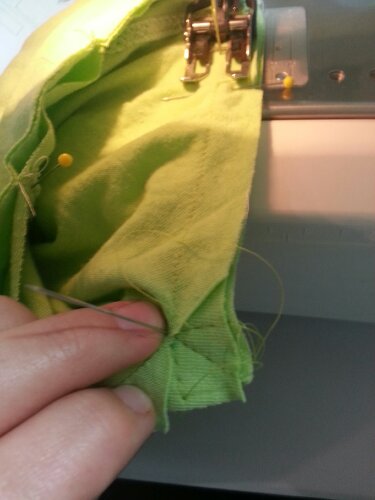
On the wrong side, start sewing at center back, adjusting the fabric as you go to match notches, and dots accordingly. {The band is slightly smaller on purpose! That ensures it to lay flat when finished.} When you get close to the V, take the needle that is matching the star and center front dot out half way. Keep the needle poking out so it still keeps the matches together, but doesn’t direct the rest of the loose fabric. {Watch out! It’s pokey}
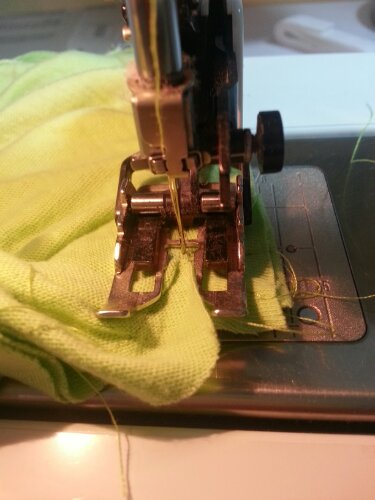
Sew along the 5/8in {or whatever your seam allowance is}. Keep the raw edges together, you will still be sewing a straight line, and the shirt front will be flat against the band, where you are sewing {but not on the other side of the V}. Sew until you hit the center of the V, which is also the center of the star, keep your needle down and get ready to pivot. {I can not say the word pivot without screaming it in my head like Ross from Friends}
Needle down still, lift your presser foot up. Rotate the neck so that your now facing the rest of the V. You’ll want to adjust the excess fabric so that this side now lays flat and the raw edges align. Lower the foot, and sew the rest of the neck, all the way around, easing in the shirt to the band and continuing to match dots and notches.
This is what it will look like. {hopefully} Sometimes I mess it up, and I rip it out and do it over. Or, I call it a feature, convince myself I like it better than the normal and leave it. It happens, we’re human.
Then I sew another reinforcing line just inside the original line.
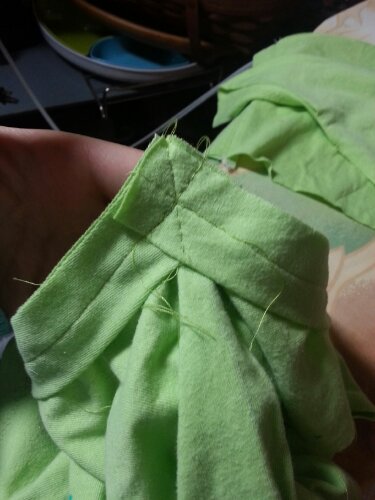
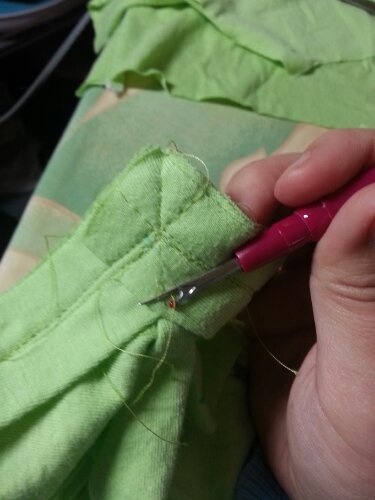
Rip out the basting seams. There are three, and go carefully. You do not want to rip out the ones you just worked so hard to get right. I will actually pull out the baste seams when I can, grabbing one of the ends and pull slightly, sometimes they pull right out, sometimes they need the seam ripper.
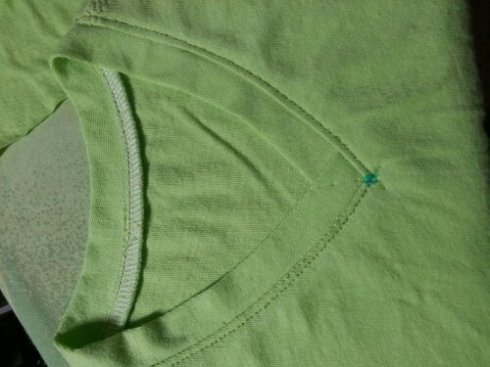
Then you have this beautiful V. {I was using a stretch need but it’s not ballpoint. I recommend a ballpoint if you are worried about the basted lines showing}
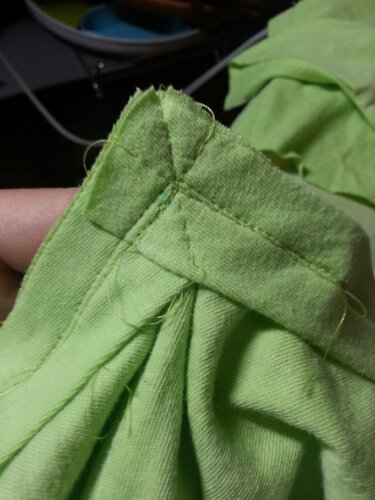
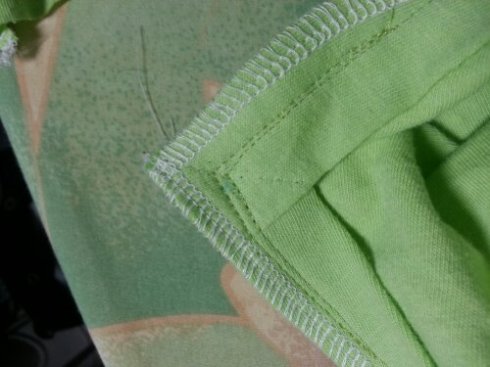
Here’s what it looks like on the other side.
I pressed it.
Then serged it. If you don’t have a serger, you don’t need one. Just go straight to the top stitching.
And the other other side’s view.
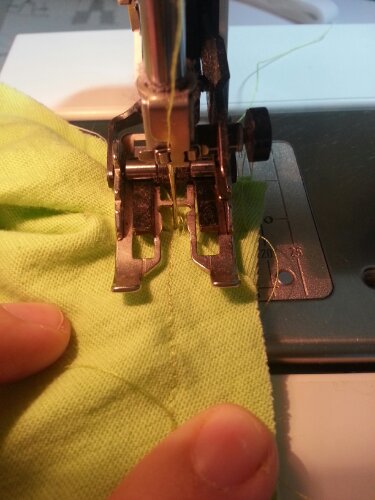
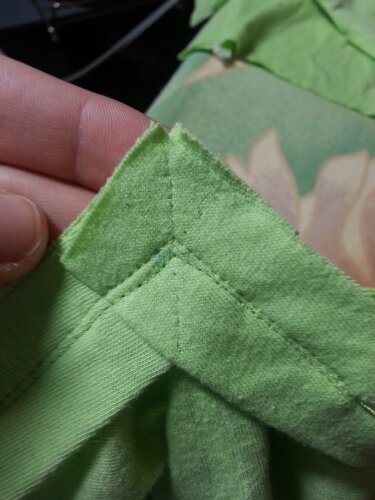
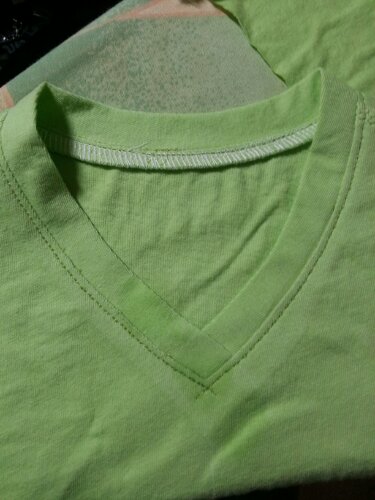
Topstitch. Use a fun stitch that has a stretch to it, this one is slightly thicker of a stitch. I start at the center V and just go around if I am using a crazy stitch and just overlap them at the end. I like the look and it’s easier than trying to guess when the needle is going to be going forward or backwards. If your using a regular stretch stitch or zig zag, you can get fancy, start at the center back and then keep your need down when you get to the point of the V, rotate and have a lovely finished V.
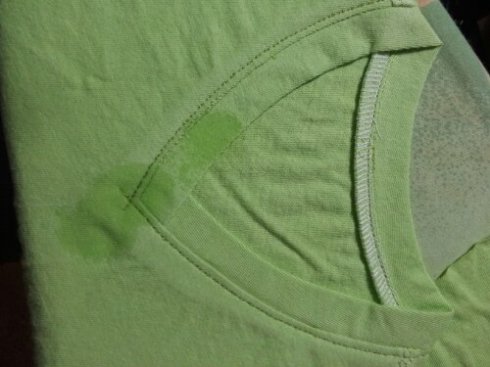
I saw that some of my foundation stitches showed through here, so I ripped them out, and used some water to erase my water soluble ink dot.
And here it is!






That is fabulous. I’ve only tried one v neck t shirt and found it so hard to do – now I’m keen to try again with this great photo tutorial. Thank you so much for taking the time to do this for all of us novice sewers out there. Its much appreciated.
LikeLike
Oh, I’m so excited that you have found it helpful!
LikeLike
Thanks for the tutorial! I’m planning on making my first knit tees soon, and was wondering about neck bands.
(I also couldn’t help but LOL at your Ross reference!)
LikeLike
I’m glad I could bring a smile to your face:)
LikeLike
Thank you for the tutorial! I have never even thought of doing a v-neck shirt before.
LikeLike
Oh I’m glad you like it!
LikeLike
Awesome explanation and photos! What an encouragement!
LikeLike
Thanks for the great tutorial!
LikeLike
Thank you for this tutorial!! I have a favorite r shirt that I was thinking about using as a pattern and it has a v neck!!!
LikeLike
You’re very welcome! Good luck with the shirt 😀
LikeLike
I like it
LikeLike
A v-neckline has been intimidating for many years and, even after your great tutorial, I think I still like a round neckline best. Good thing, hunh?
LikeLike
Thanks for this great help, just tried v neck t shirt and following the pattern instructions got into a mess ended more round, so ripped it out and had another go, still not perfect but much better and it’s a V neck. Now have another to try so hoping for better next time. It does take me a few goes some times to get things, being a male but only make clothes for myself and enjoy it.
LikeLike
I am 65 & have been sewing (when time allowed) since I was 18. Your turorials are by far the most simple & straightforward. (& forgiving of our humanity) of any I have ever seen. 9 grandchildren are now retesting my sewing skills with new ( that sometimes look EXACTLY LIKE I MADE MYSELF 45 YEARS AGO.) designs. I find myself constantly relearning & reviewing things I forgot I knew. You tutorials are refreshinh & delightful. Thank you so much for making time to share them.
LikeLike