Tag Archives: Christmas

Christmas Gifts Finished, Finally.

12 Dec

My family is no longer allowed to have children. Seriously, that’s a lot of pajamas!I’m not joking! {OK, I’m joking, I love all these kiddos and I want more more more!}
2 boys and a thousand girls {6 girls} Christmas pajamas have been sewn. I started planning this in September. And I will do it again next year:) I am hoping they will wear them Christmas eve!

Hand dyed flannel fabrics: Purple/Pink/Blue

Jersey fabrics: Green and Dark Purple old jersey sheet sets.

Florals: Already in my stash from grandma’s and such.

DIY ombre dye! Had fun dip dying the skirt fabric before I cut out the pattern.

DIY ombre dye! Had fun dip dying the skirt fabric before I cut out the pattern.

Vintage floral pattern was used to supplement my lack of purple fabric. I simply love the way this one turned out.

Vintage floral pattern was used to supplement my lack of purple fabric. I simply love the way this one turned out.

This is not my favorite style, but I was so happy to learn how to sew this!

This is not my favorite style, but I was so happy to learn how to sew this!

Oldest cousin's dress. I couldn't decide if she would like pink or purple better, so i did both.

Oldest cousin’s dress. I couldn’t decide if she would like pink or purple better, so i did both.

The Green accent in this dress actually pulls in the rest of the collection. {accidental, but I love it}

The Green accent in this dress actually pulls in the rest of the collection. {accidental, but I love it}

The simplest of the bunch for Eli.

The simplest of the bunch for Eli.

Special hem!

Special hem!

Fleece Pajamas

Each child that is receiving a separates set has a special stitch design.

Each child that is receiving a separates set has a special stitch design.

Olive's didn't get a bow, because when mommy is the seamstress, she skimps on yours! Promise I won't do this next year!

Olive’s didn’t get a bow, because when mommy is the seamstress, she skimps on yours! Promise I won’t do this next year!

Fleece Pajamas

Bow on the back of the booty, to match her newborn sister.

Bow on the back of the booty, to match her newborn sister.

Since this set is for a newborn, I add a bow on the bottom of one of the pant legs.

Since this set is for a newborn, I add a bow on the bottom of one of the pant legs.

This collar didn't exactly turn out perfectly, but I ended up liking the look.

This collar didn’t exactly turn out perfectly, but I ended up liking the look.

Fleece Pajamas

And ruffles:)

And ruffles:)

This very special girl loves the color green, so she got the green jersey instead of the purple!

This very special girl loves the color green, so she got the green jersey instead of the purple!

Lessons learned:

  • ask for waist measurements of all the kids {some of them might be too big}
  • This pattern’s torso length is insanely short. {Ruffles, and special hems were added to extend the length for the kiddos because I could feel it in my bones that they are going to be belly shirts)
  • Ironing freshly RIT dyed fabric results in discoloration.
  • Sewing the armseye on a size 5 or smaller is difficult unless you sew it flat}.
  • Sometimes I hem one pant leg in the rong direction, which means technically one pant is sewn on backwards. Thank goodness this pattern has a similar front and back.
  • I will not put in as much effort for my own clothing {or my own children} as I do for sewing gifts for other people. I hope to improve this.

So what do you think?

Snow White

14 Nov

My niece’s birthday is coming up in December and I’m ashamed to say I missed her in the planning ahead part of my sewing list. Between 3 other niece/nephew birthdays and 8 niece/nephew Christmas gifts, I missed it. But! That was in September, and I remembered her birthday in November, which is still a month ahead of time, so I really could have done worse! Anywho, she’s all about dress up. She was Cinderella for Halloween and I asked her mom which princess dress she would like that she didn’t already have. Snow White! I used the dress pattern that I will be using for her Christmas pajama dress, so it really worked out perfectly. The only thing I changed were the sleeves and collar.


Olive is modeling it here, she’s a whole size and a half too small for the dress {and she is a cranky little munchkin today} so bear with me and the quality of the pictures:)


Super, cranky. “Maaaammmmmaaaaaaa, soooooocccckkkkks” She really wanted socks on.

I even made a little red bow and slid it onto a clip. 

The sleeves are pleated in the actual fashion of Snow White’s dress. Box pleated at the arm cuff, and opened slightly to ease in the armseye. 
The lion was the model before Love woke up, and frankly, he might be a better model. I’m not sure:)


Sewing a T-shirt V-Neck Band {Tutorial}

1 Nov

I am making a billion {8} knit pajama tops for Christmas gifts this year, and I have gone from feeling intimidated by neckbands, to feeling pretty comfortable with them. I thought I would share my step by step with you, just in case someone out there might need some second reference. I am using a walking foot, and crazy old leftover jersey sheets. This is a 4T sized neckband, so don’t be alarmed at its size:) I mainly use the lighting bolt looking stretch stitch on my Bernina, and a stretch needle. I wish I had a ballpoint needle {you’ll see why later}.

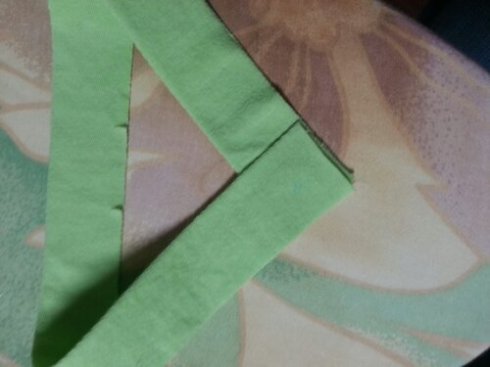
Overlap your neckband. Right over left, or left over right, do what you please.
image

Baste the ends of the neckband together along seam lines {I did 5/8in}, though all thicknesses.

image

Basting the second side, forming an X.

image

Then Baste up the center, to make a star {*}

image

It will look this when you are finished. I also reinforced the center front of the shirt. I was careful not to stretch the fabric, and I used a normal stretch stitch. Then I snipped the V right to the dot, being careful not to snip my stitches that I just sewed.

image

Next up, I made sure to complete the neck hole, by joining the sleeves right sides together. No I’m ready to put the band in!

image

It’s really hard to show this in pictures, but I did my best, so here goes.

With right sides together, pin the neckband to the neck edge, matching center back notches, and aligning the shoulder seams with the dots that match. Match the center front dot on the shirt front with the center of your star, and pin.

image

Here you can see how I pinned the V. {There will be a lot of extra fabric in the V on the other side, I made sure the head of the pin was lined up in the center of the star and went all the way through the center dot to match them up, then the rest of the pin goes through to keep the pin in, not to hold the gobs of fabric in place}

image

On the wrong side, start sewing at center back, adjusting the fabric as you go to match notches, and dots accordingly. {The band is slightly smaller on purpose! That ensures it to lay flat when finished.} When you get close to the V, take the needle that is matching the star and center front dot out half way. Keep the needle poking out so it still keeps the matches together, but doesn’t direct the rest of the loose fabric. {Watch out! It’s pokey}

image

Sew along the 5/8in {or whatever your seam allowance is}. Keep the raw edges together, you will still be sewing a straight line, and the shirt front will be flat against the band, where you are sewing {but not on the other side of the V}. Sew until you hit the center of the V, which is also the center of the star, keep your needle down and get ready to pivot. {I can not say the word pivot without screaming it in my head like Ross from Friends}

image

Needle down still, lift your presser foot up. Rotate the neck so that your now facing the rest of the V. You’ll want to adjust the excess fabric so that this side now lays flat and the raw edges align. Lower the foot, and sew the rest of the neck, all the way around, easing in the shirt to the band and continuing to match dots and notches.

image

This is what it will look like. {hopefully} Sometimes I mess it up, and I rip it out and do it over. Or, I call it a feature, convince myself I like it better than the normal and leave it. It happens, we’re human.

image

Then I sew another reinforcing line just inside the original line.

image

Rip out the basting seams. There are three, and go carefully. You do not want to rip out the ones you just worked so hard to get right. I will actually pull out the baste  seams when I can, grabbing one of the ends and pull slightly, sometimes they pull right out, sometimes they need the seam ripper.

image

Then you have this beautiful V. {I was using a stretch need but it’s not ballpoint. I recommend a ballpoint if you are worried about the basted lines showing}

image

Here’s what it looks like on the other side.

image

I pressed it.

image

Then serged it. If you don’t have a serger, you don’t need one. Just go straight to the top stitching.

image

And the other other side’s view.

image

Topstitch. Use a fun stitch that has a stretch to it, this one is slightly thicker of a stitch. I start at the center V and just go around if I am using a crazy stitch and just overlap them at the end. I like the look and it’s easier than trying to guess when the needle is going to be going forward or backwards. If your using a regular stretch stitch or zig zag, you can get fancy, start at the center back and then keep your need down when you get to the point of the V, rotate and have a lovely finished V.

image

I saw that some of my foundation stitches showed through here, so I ripped them out, and used some water to erase my water soluble ink dot.

image

And here it is!

image

Handmade gifts update.

21 Oct

I am currently figuring out how I want to finish up the car roll. I am almost finished with it and I am really excited for it to be finished. I just finished an adult Halloween costume as well. As soon as I take good pictures of that one I’ll post.

I also finished playdough mats for all of the kids to give as well. These are laminated sheets that inspire creative play using playdough, or dry erase markers as well. Each child get a variety of sheets including numbers and faces along with other types of play subjects. I am completely finished with these!!

Here is the great of my sewing check list. I still have a lot to do, so November will continue to be a busy one.

image

image

Progress

5 Oct

Just wanted to post really quickly to update. I’ve finished two pajama sets and one pant as well. Which leaves 2 more pants, 3 shirts and 3 pajama gowns. It’s going much faster than I anticipated, which is really awesome!
I’m experimenting with fancy machine stitches so that all of the children’s sets are similar but unique:)
I finished most of Eli’s Halloween {or olive’s} ahead if schedule and might just take a second look at my thurlow trouser muslin in order to do the sew along since I’m so ahead of schedule!

I also got started on my niece’s birthday crayon roll up. I found some wipe-able fabric in my many scrap stash boxes and a pre-sewn quit block that’s just the right amount of girly! I’m using both fabrics and I couldn’t be more excited to see how it turns out!

Really I feel amazing about my progress and can’t wait to take some photos of it all finished to show off to you guys!

Anyone else making good progress on handmade Christmas gifts?